舌の根も乾かないうちに Nginx を導入してみた。
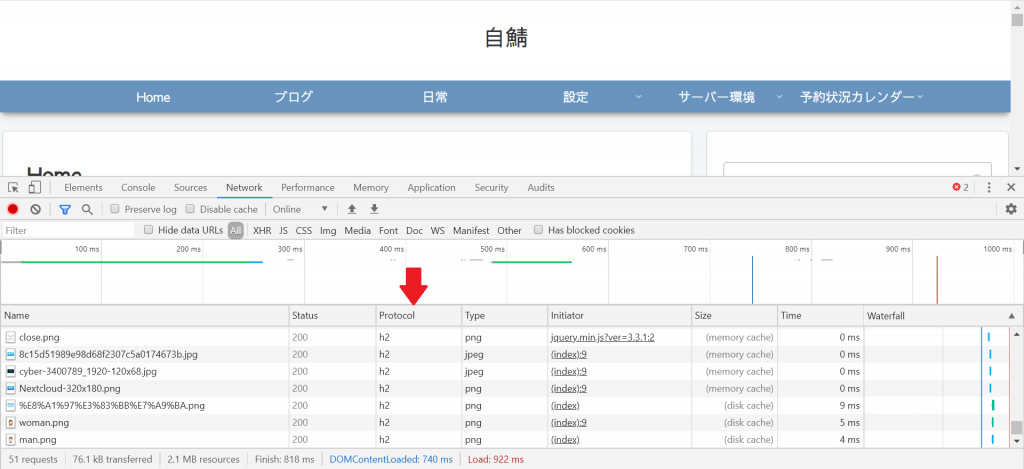
ついでに HTTP/2 を試してみた。
導入の目的は・・・特にない。
概要
構成イメージはこんな感じ。リバースプロキシとバックエンドで同じサーバー証明書と秘密鍵を適用させることが正しい方法かどうかググっても判らなかった。本を買おうかな。
Client --- (https) --- Server1[Nginx Reverse Proxy]
             |
             |
              + --- (https) +--- [Apache VirtualHost1]
             |       |   ex1.mydns.jp
             |       |
             |       +--- [Apache VirtualHost2]
             |          ex2.mydns.jp
         ~~~Server2~~~
             |
             |
             + --- (http) --- [Apache VirtualHost3]
                        nextcloud.mydns.jp
設定
Apache 設定ファイルの変更
/etc/apache2/sites-enabled/ の設定ファイルを、port 8443 で待ち受けるようにVirtualHost のディレクティブを変更する。ex1.mydns.jp.conf は要らない。
$ sudo vi /etc/apache2/sites-enabled/ex1.mydns.jp-le-ssl.conf


<IfModule mod_ssl.c>
<VirtualHost *:8443>
ServerName ex1.mydns.jp
DocumentRoot /home/hoge/public_html/ex1.mydns.jp
ErrorLog /var/log/apache2/virtual.host.error.log
CustomLog /var/log/apache2/virtual.host.access.log combined
LogLevel warn

  <Directory /home/hoge/public_html/ex1.mydns.jp>
    Options FollowSymlinks Includes
    AllowOverride All
    AddType text/html .html
    Require all granted
  </Directory>


SSLCertificateFile /etc/letsencrypt/live/ex1.mydns.jp/fullchain.pem
SSLCertificateKeyFile /etc/letsencrypt/live/ex1.mydns.jp/privkey.pem
Include /etc/letsencrypt/options-ssl-apache.conf
</VirtualHost>
</IfModule>
ex2.mydns.jp も同様、port 8443 に変更する。
続い��� /etc/apache2/ports.conf の待ち受け port を変更する。port 8080 を残しているのは、 Nginx と競合させないため。実際には使用することはない。
# If you just change the port or add more ports here, you will likely also
# have to change the VirtualHost statement in
# /etc/apache2/sites-enabled/000-default.conf

Listen 8080

<IfModule ssl_module>
        Listen 8443
</IfModule>

<IfModule mod_gnutls.c>
        Listen 8443
</IfModule>
最後に HTTP2 のモジュールを有効化、Apache を再起動する。
$ sudo a2enmod http2
$ sudo service apache2 restart
Nginx のインストール
既存の構成に Nginx を追加インストールする。SSL 証明書は取得済みのものを Server1 の VirtualHost と Apache の VirtualHost1 で共用することになる。
$ sudo apt -y install nginx python3-certbot-nginx

# 作業中なので停止しておく。
$ sudo apt service nginx stop
Nginx 設定ファイルの作成
インストール直後は /etc/nginx/sites-enabled/ に設定ファイル default のシンボリックがあるから削除する。
/etc/nginx/sites-available/ に移動して、ドメイン毎の設定ファイルを作成する。ファイル名に .conf はいらない。あとで certbot を使ってサーバー証明書と秘密鍵を設定するから、この時点では次のような内容でいい。もちろん、直接書き込んでも OK 。
$ sudo vi /etc/nginx/sites-available/ex1.mydns.jp


server {

    server_name ex1.mydns.jp;

    proxy_set_header    Host    $host;
    proxy_set_header    X-Real-IP    $remote_addr;
    proxy_set_header    X-Forwarded-Host       $host;
    proxy_set_header    X-Forwarded-Server    $host;
    proxy_set_header    X-Forwarded-For    $proxy_add_x_forwarded_for;

    location / {
        proxy_pass    https://192.168.1.5:8443;  # Server1のアドレス
    }
}


$ sudo vi /etc/nginx/sites-available/ex2.mydns.jp


server {

    server_name ex2.mydns.jp;

    proxy_set_header    Host    $host;
    proxy_set_header    X-Real-IP    $remote_addr;
    proxy_set_header    X-Forwarded-Host       $host;
    proxy_set_header    X-Forwarded-Server    $host;
    proxy_set_header    X-Forwarded-For    $proxy_add_x_forwarded_for;

    location / {
        proxy_pass    https://192.168.1.5:8443;  # Server1のアドレス
    }
}


$ vi /etc/nginx/sites-available/nextcloud.mydns.jp


server {

    server_name nextcloud.mydns.jp;

    proxy_set_header    Host    $host;
    proxy_set_header    X-Real-IP    $remote_addr;
    proxy_set_header    X-Forwarded-Host       $host;
    proxy_set_header    X-Forwarded-Server    $host;
    proxy_set_header    X-Forwarded-For    $proxy_add_x_forwarded_for;

    location / {
        proxy_pass    http://192.168.1.6;  # Server2のアドレス
    }
}
作成が終わったら /etc/nginx/sites-enabled/ にシンボリックを作る。
$ sudo ln -s /etc/nginx/sites-available/ex1.mydns.jp /etc/nginx/sites-enabled/ex1.mydns.jp
$ sudo ln -s /etc/nginx/sites-available/ex2.mydns.jp /etc/nginx/sites-enabled/ex2.mydns.jp
$ sudo ln -s /etc/nginx/sites-available/nextcloud.mydns.jp /etc/nginx/sites-enabled/nextcloud.mydns.jp
ufw
port 8443 への接続を許可する。
$ sudo ufw allow 8443
$ sudo ufw reload
certbot の実行
python3-certbot-nginx をインストールしたことで、既存サーバーの Apache と追加した Nginx を選択して設定することができるようになっている。ただ、今後は Apache の設定ファイルを書き換えることは無いから Nginx だけで用は足りる。
結果は次のとおり。
$ sudo certbot
Saving debug log to /var/log/letsencrypt/letsencrypt.log

How would you like to authenticate and install certificates?
- - - - - - - - - - - - - - - - - - - - - - - - - - - - - - - - - - - - - - - -
1: Apache Web Server plugin (apache)
2: Nginx Web Server plugin (nginx)
- - - - - - - - - - - - - - - - - - - - - - - - - - - - - - - - - - - - - - - -
Select the appropriate number [1-2] then [enter] (press 'c' to cancel): 2
Plugins selected: Authenticator nginx, Installer nginx

Which names would you like to activate HTTPS for?
- - - - - - - - - - - - - - - - - - - - - - - - - - - - - - - - - - - - - - - -
1: ex1.mydns.jp
2: ex2.mydns.jp
3: nextcloud.mydns.jp
- - - - - - - - - - - - - - - - - - - - - - - - - - - - - - - - - - - - - - - -
Select the appropriate numbers separated by commas and/or spaces, or leave input
blank to select all options shown (Enter 'c' to cancel): 1
Cert not yet due for renewal

You have an existing certificate that has exactly the same domains or certificate name you requested and isn't close to expiry.
(ref: /etc/letsencrypt/renewal/ex1.mydns.jp.conf)

What would you like to do?
- - - - - - - - - - - - - - - - - - - - - - - - - - - - - - - - - - - - - - - -
1: Attempt to reinstall this existing certificate
2: Renew & replace the cert (limit ~5 per 7 days)
- - - - - - - - - - - - - - - - - - - - - - - - - - - - - - - - - - - - - - - -
Select the appropriate number [1-2] then [enter] (press 'c' to cancel): 1
Keeping the existing certificate
Deploying Certificate to VirtualHost /etc/nginx/sites-enabled/ex1.mydns.jp

Please choose whether or not to redirect HTTP traffic to HTTPS, removing HTTP access.
- - - - - - - - - - - - - - - - - - - - - - - - - - - - - - - - - - - - - - - -
1: No redirect - Make no further changes to the webserver configuration.
2: Redirect - Make all requests redirect to secure HTTPS access. Choose this for
new sites, or if you're confident your site works on HTTPS. You can undo this
change by editing your web server's configuration.
- - - - - - - - - - - - - - - - - - - - - - - - - - - - - - - - - - - - - - - -
Select the appropriate number [1-2] then [enter] (press 'c' to cancel): 2
Traffic on port 80 already redirecting to ssl in /etc/nginx/sites-enabled/ex1.mydns.jp

- - - - - - - - - - - - - - - - - - - - - - - - - - - - - - - - - - - - - - - -
Congratulations! You have successfully enabled https://ex1.mydns.jp

You should test your configuration at:
https://www.ssllabs.com/ssltest/analyze.html?d=ex1.mydns.jp
- - - - - - - - - - - - - - - - - - - - - - - - - - - - - - - - - - - - - - - -

IMPORTANT NOTES:
 - Congratulations! Your certificate and chain have been saved at:
   /etc/letsencrypt/live/ex1.mydns.jp/fullchain.pem
   Your key file has been saved at:
   /etc/letsencrypt/live/ex1.mydns.jp/privkey.pem
   Your cert will expire on 2020-07-23. To obtain a new or tweaked
   version of this certificate in the future, simply run certbot again
   with the "certonly" option. To non-interactively renew *all* of
   your certificates, run "certbot renew"
 - If you like Certbot, please consider supporting our work by:

   Donating to ISRG / Let's Encrypt:   https://letsencrypt.org/donate
   Donating to EFF:                    https://eff.org/donate-le
ex2.mydns.jp と nextcloud.mydns.jp も同様に実行する。
設定ファイルの微調整
certbot で修正された設定ファイルの listen に http2 を追加する。他は何も変更なし。
server {

    server_name ex1.mydns.jp;

    proxy_set_header    Host    $host;
    proxy_set_header    X-Real-IP    $remote_addr;
    proxy_set_header    X-Forwarded-Host       $host;
    proxy_set_header    X-Forwarded-Server    $host;
    proxy_set_header    X-Forwarded-For    $proxy_add_x_forwarded_for;

    location / {
        proxy_pass    https://localhost:8443;
    }


    listen 443 ssl http2; # managed by Certbot
    ssl_certificate /etc/letsencrypt/live/ex1.mydns.jp/fullchain.pem; # managed by Certbot
    ssl_certificate_key /etc/letsencrypt/live/ex1.mydns.jp/privkey.pem; # managed by Certbot
    include /etc/letsencrypt/options-ssl-nginx.conf; # managed by Certbot
    ssl_dhparam /etc/letsencrypt/ssl-dhparams.pem; # managed by Certbot

}
server {
    if ($host = ex1.mydns.jp) {
        return 301 https://$host$request_uri;
    } # managed by Certbot


    server_name ex1.mydns.jp;
    listen 80;
    return 404; # managed by Certbot

}
一通りの設定が終わったら、念のため設定ファイルに間違いが無いか確認して、OK なら Nginx を再起動する。
$ sudo nginx -t
nginx: the configuration file /etc/nginx/nginx.conf syntax is ok
nginx: configuration file /etc/nginx/nginx.conf test is successful

$ sudo service nginx restart
大まかな変更の流れは以上のとおり。
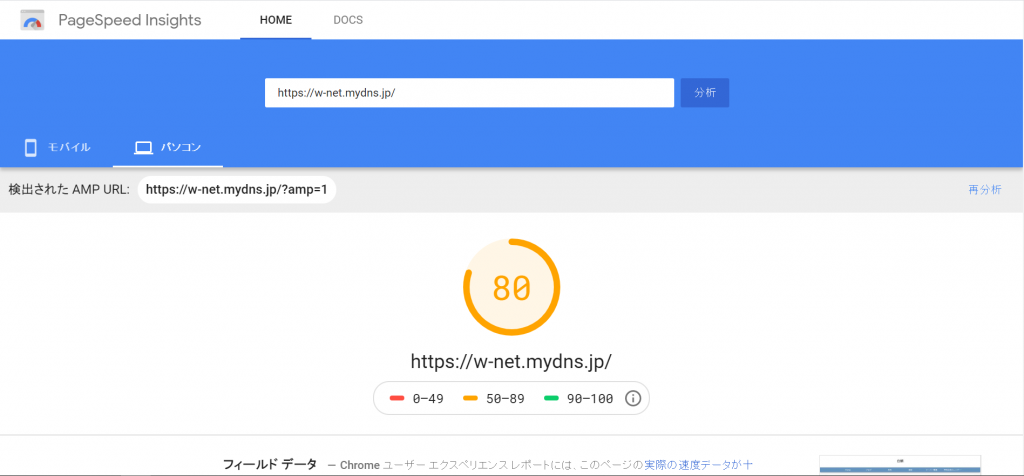
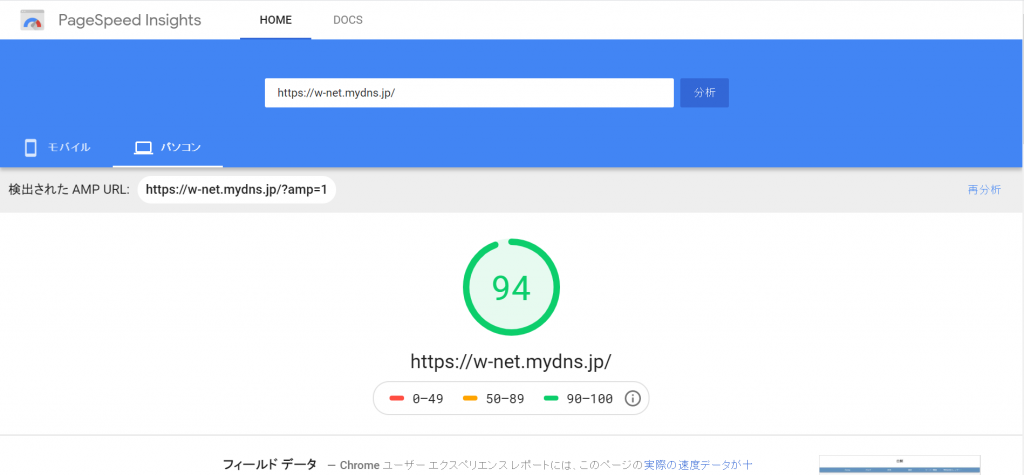
変更前後の PageSpeed Insights の結果は次のとおりでPC での改善効果が大きい。
→画像は HTTP/2 ではなく、おそらく APCu Cocoon の高速化設定と OPcache の効果によるもの。
→またまた勘違い。この時点ではまだ APCu は機能していない。
あとで備忘録として記事を書こう。
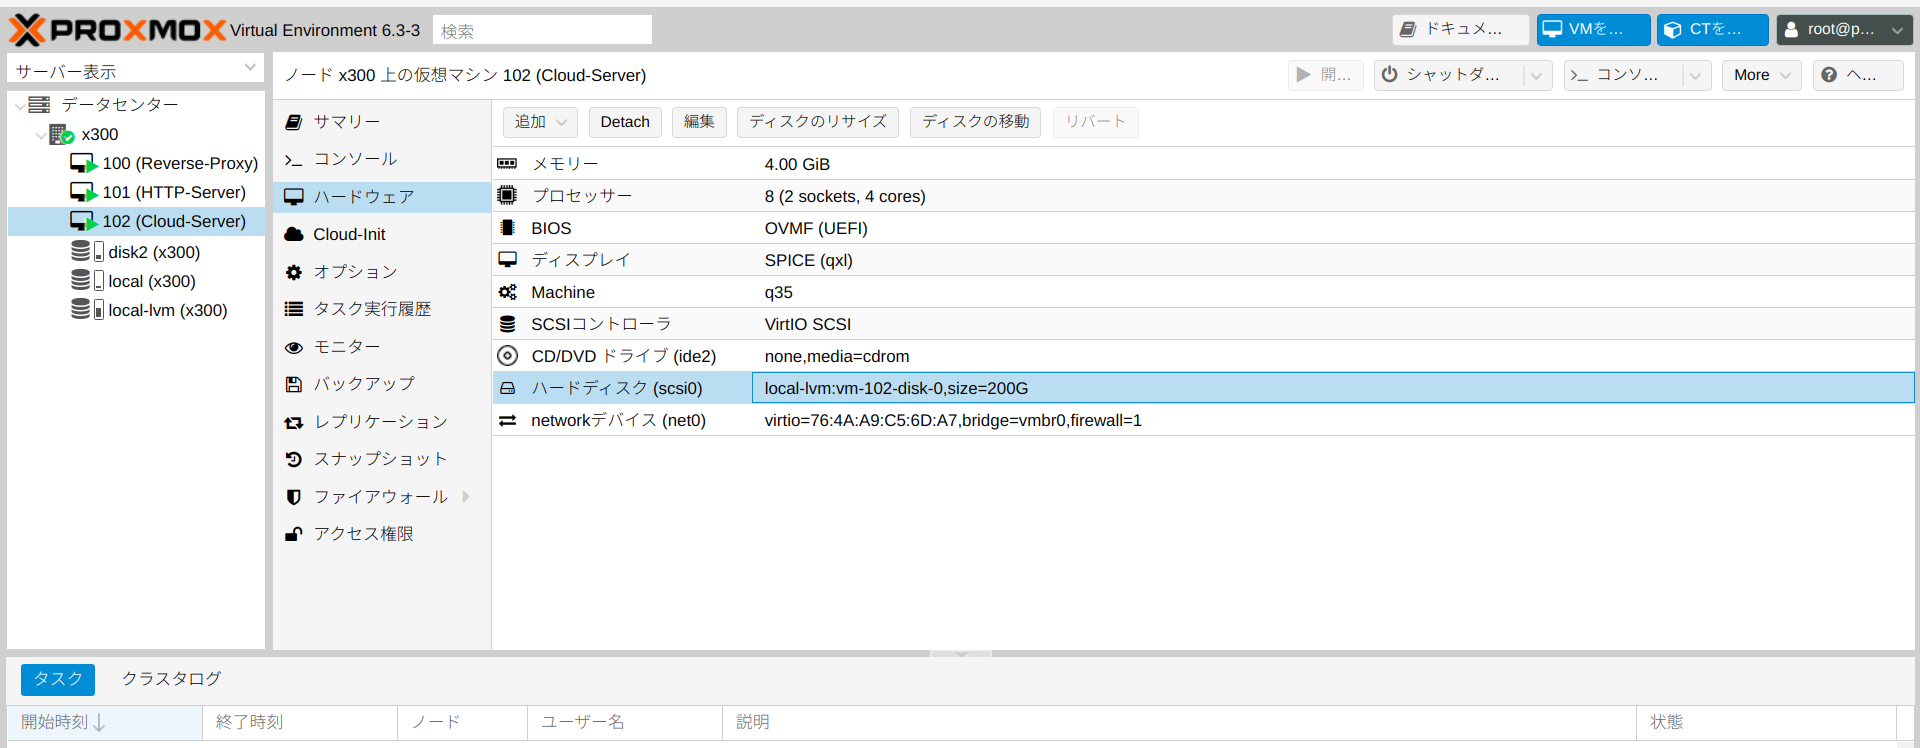
Nextcloud でセキュリティ警告が出てるから後日対応しよう。






コメント